
Having a dishwasher that does not fill with water is very annoying. If your Kitchenaid dishwasher does not fill with water, there may be a problem with the water supply. Identifying the real reason is the hardest part.
Here’s why your Kitchenaid dishwasher is not filling with water and what you can do about it.
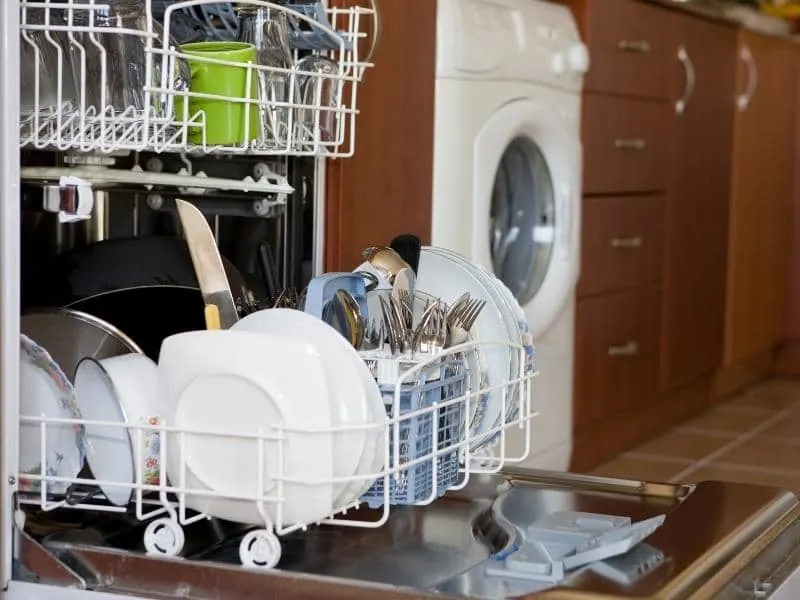
Kitchenaid dishwasher not filling with water
The most common reasons for a Kitchenaid dishwasher not filling with water are clogged drains, low water levels, faulty water inlet valves, or not getting water from the sink. In addition, it may be caused by an insufficient supply of water from the sink or a dishwasher that does not get hot enough.

Your Kitchenaid dishwasher may not fill with water for a variety of reasons, and finding the real reason is the most challenging part. The following are some possible causes and their solutions:
Getting no water from the sink:
There may be a problem with the dishwasher getting water from the sink. Ensure that the faucet is turned on and that water is flowing into the dishwasher. If you have a Delta Faucet, make sure it is properly installed and functioning.
Solution:
Before troubleshooting this issue, turn off all major appliances in your house, including your refrigerator and washer/dryer.
By plugging in an appliance and checking for power at the dishwasher’s electrical outlet, verify that there is adequate water flow coming into the dishwasher from either of its sources (faucet or drain).
Low water level:
There may be a shortage of water in the dishwasher. The most common reason is that you drained the sink’s basin during the night or when you were away from home.
GE Appliances’ service policy states that it will take about 48 hours for the dishwasher to refill with new water.
Solution:
Turn off our faucet’s hot and cold valves at their source (spout) and wait 30 seconds before turning them back on – if they close too quickly, they may be defective.
Check the dishwasher’s water supply by turning off at least one faucet in your home, if the valves are still good. The main water line of your dishwasher will need to be fixed or replaced if none of these remedies work.
Water leaking from the dishwasher:
You may need to replace one or more water lines in your KitchenAid dishwasher. Test for leaks by pouring a few drops of white vinegar onto the floor just below where the dishwasher sits, waiting five minutes, and looking for beads.
A leak will likely show up on both floors and around other fixtures in your home if it is an overall leak.
Solution:
A professional contractor or technician will be needed to fix or replace the lines. Taking the dishwasher to a service center requires disassembling it. Alternatively, you can replace the lines yourself with an affordable repair kit.
Faulty water inlet valve:
A faulty water inlet valve may cause the dishwasher to get water but not wash dishes properly. To test this, turn off all appliances in the house and then remove the screws that hold the dishwasher’s front panel on (usually four screws).
Replace a defective water inlet valve if necessary, by lifting the front panel.
Solution:
You can improve water flow by removing any obstructions in the dishwasher’s openings if you cannot replace the front panel. It may also be necessary to replace the dishwasher’s water inlet valve if it has a problem.
How do I check my Kitchenaid dishwasher water supply?
The first thing you should do if your dishwasher isn’t working properly is to ensure that the water supply is adequate. You will need to remove the front panel of your appliance to gain access to the inner workings.
The first step is to locate and unscrew the water inlet tube (it should be white plastic). Insert a straw into both ends of the tubing and twist it around to check for clogging or debris buildup inside the hose connection.
The water supply may be inadequate if you see obstructions or discoloration on either end of the hose.
Afterward, locate the water drain hose and unscrew it from the dishwasher’s bottom panel. Insert a straight rod or dowel into the drain hose opening on the dishwasher’s bottom panel.
The water supply may also be inadequate if excessive dishes, food particles, or grease are accumulated around this area. Replace it at once if necessary.
How do you test the water inlet valve on a Kitchenaid dishwasher?
You can test the water inlet valve on a Kitchenaid dishwasher by turning off the power and removing the panel covering it. A malfunctioning valve will likely result in water flooding into other parts of the machine when it is turned on.
The water inlet valve on a Kitchenaid dishwasher should be tested as follows:
Unplug the dishwasher:
The first thing you need to do is turn off the power to the dishwasher as soon as possible.
The best way to do this is to either unplug the electrical cord that runs to the dishwasher from the wall or (in some cases) pull out and disconnect the dishwasher’s plug from the socket at the back of the dishwasher.
Remove the water inlet valve panel:
In most cases, it is possible to do this by removing one or more screws from the sides or the top of the dishwasher’s housing to remove the door. After removing this panel, you will be able to see and access the water inlet valve once it has been removed from its bracket.
Test for leaks:
Check that there are no leaks by turning on the power to your dishwasher and watching for flooding or drainage around the valve area as soon as the power is turned on.
In case there are any problems with the water supply of your machine, you may need to replace the valve assembly if the problem persists.
Replace panel or valve as needed:
You may need to replace the water inlet valve on your machine if you notice that there are any signs of leakage. Your local dishwasher repair shop will usually be able to provide you with a new assembly at a reasonable price.
Reattach the panel and screw it back in place:
Once you have determined that there is no leak in the panel, you should reattach it and screw it back into place. Please make sure to replace any screws that may have come loose during the testing process.
How do you unclog a Kitchenaid dishwasher water inlet valve?
Kitchenaid dishwashers are known for their durable construction and often last for many years. Blockages in the water inlet valve can, however, cause the machine to fill up with dirty water and eventually stop working.
Remove all items from the dishwasher:
Firstly, you will need to clear the dishwasher of all items so that you can access and unblock the water inlet valve so that you can access and unblock it. You should remove any dishes, utensils, or glasses that may have been left in the machine.
Put your dishwasher on its highest setting:
The next step is to turn on your dishwasher at the highest setting and wait for it to fill up with water once you have removed all items from it. By doing so, you will be able to loosen any debris which may have lodged itself in the valve area.
Alternatively, follow the steps below if that doesn’t work.
Locate and unscrew the water inlet valve cover:
There is usually a screw located at the bottom of the cover that can be removed to remove the cover. After you have removed it, you will be able to see and access the actual water inlet valve that controls the flow of water into your home.
Remove any obstructions:
You must clear away any food or debris blocking the valve before reattaching the cover and starting the dishwasher again. Depending on the situation, you may need to use a plunger, your fingers, or perhaps a vacuum cleaner.
Final Thoughts
Clogged drains, low water levels, faulty inlet valves, and lack of water from the sink cause Kitchenaid dishwashers to not fill with water. To resolve this issue, you should check the water outlet pipe from the sink or dishwasher. It may be that a stepped-up line is blocking your faucet.